
I recently spent some quality time with the COLDCARD MK4, a Bitcoin-only hardware wallet that prides itself on security. This review is a first-person account of my experience – from unboxing to daily use. I’ll cover what the Coldcard MK4 is, how it works, its unique features, the setup process, user experience quirks, and how it stacks up against popular wallets like Trezor and Ledger. If you’re curious whether this COLDCARD wallet lives up to its reputation, read on for an honest, no-buzzwords tour of the device.
Overview of COLDCARD MK4
The Coldcard MK4 is a dedicated Bitcoin hardware wallet (also called a “signing device”). Unlike multi-coin wallets, it only supports Bitcoin – a deliberate choice to minimize complexity and attack surface. In essence, it’s a small calculator-like gadget with a numeric keypad and an OLED screen. You use it to store your Bitcoin private keys offline and to sign transactions safely, away from internet-connected devices.
Security is the Coldcard’s top priority. The MK4 model features two secure element chips (secure microcontrollers) instead of one, adding an extra layer of protection for your seed (private keys). Even if one chip were compromised, the attacker would still have to break the second chip and the main microcontroller – and know your PIN – to get your keys. The firmware (device software) is open-source and verifiable by the community, which means anyone can audit the code for bugs or backdoors. This transparency helps build trust among security-conscious users.
How it works?
Coldcard is designed to be used offline (air-gapped). You can operate it without ever connecting it to a computer, using methods like a microSD card to transfer data, or the new NFC feature for short-range wireless data transfer. In practice, when you want to send Bitcoin, you prepare an unsigned transaction on your computer or phone (using a software wallet), save it to the SD card (or push it via NFC), then let the Coldcard sign it. The signed transaction can then be moved back to your online device to broadcast to the network. This process keeps the private keys never directly connected to an internet-enabled device, drastically reducing risk.
Unique features:
The Coldcard MK4 is packed with security-centric functions that you won’t find in many other wallets. For example, it supports BIP-174 PSBT (Partially Signed Bitcoin Transactions), which is the standard for air-gapped transaction workflows. It also offers a duress PIN feature – you can set up a secondary PIN code that unlocks a decoy wallet with a separate address, useful if you’re ever coerced to open it. There’s even a “Brick Me” PIN that, if entered, will instantly self-destruct the device’s secure chips and wipe everything, rendering the Coldcard unusable (a nuclear option for extreme situations!). Another touch I found interesting is the anti-phishing words: every time you log in, the device shows two unique words after you enter the first half of your PIN. These words are tied to your specific Coldcard and PIN, so you can verify you’re not using a tampered device pretending to be yours. It’s a clever way to ensure you’re entering your PIN on the genuine device each time.
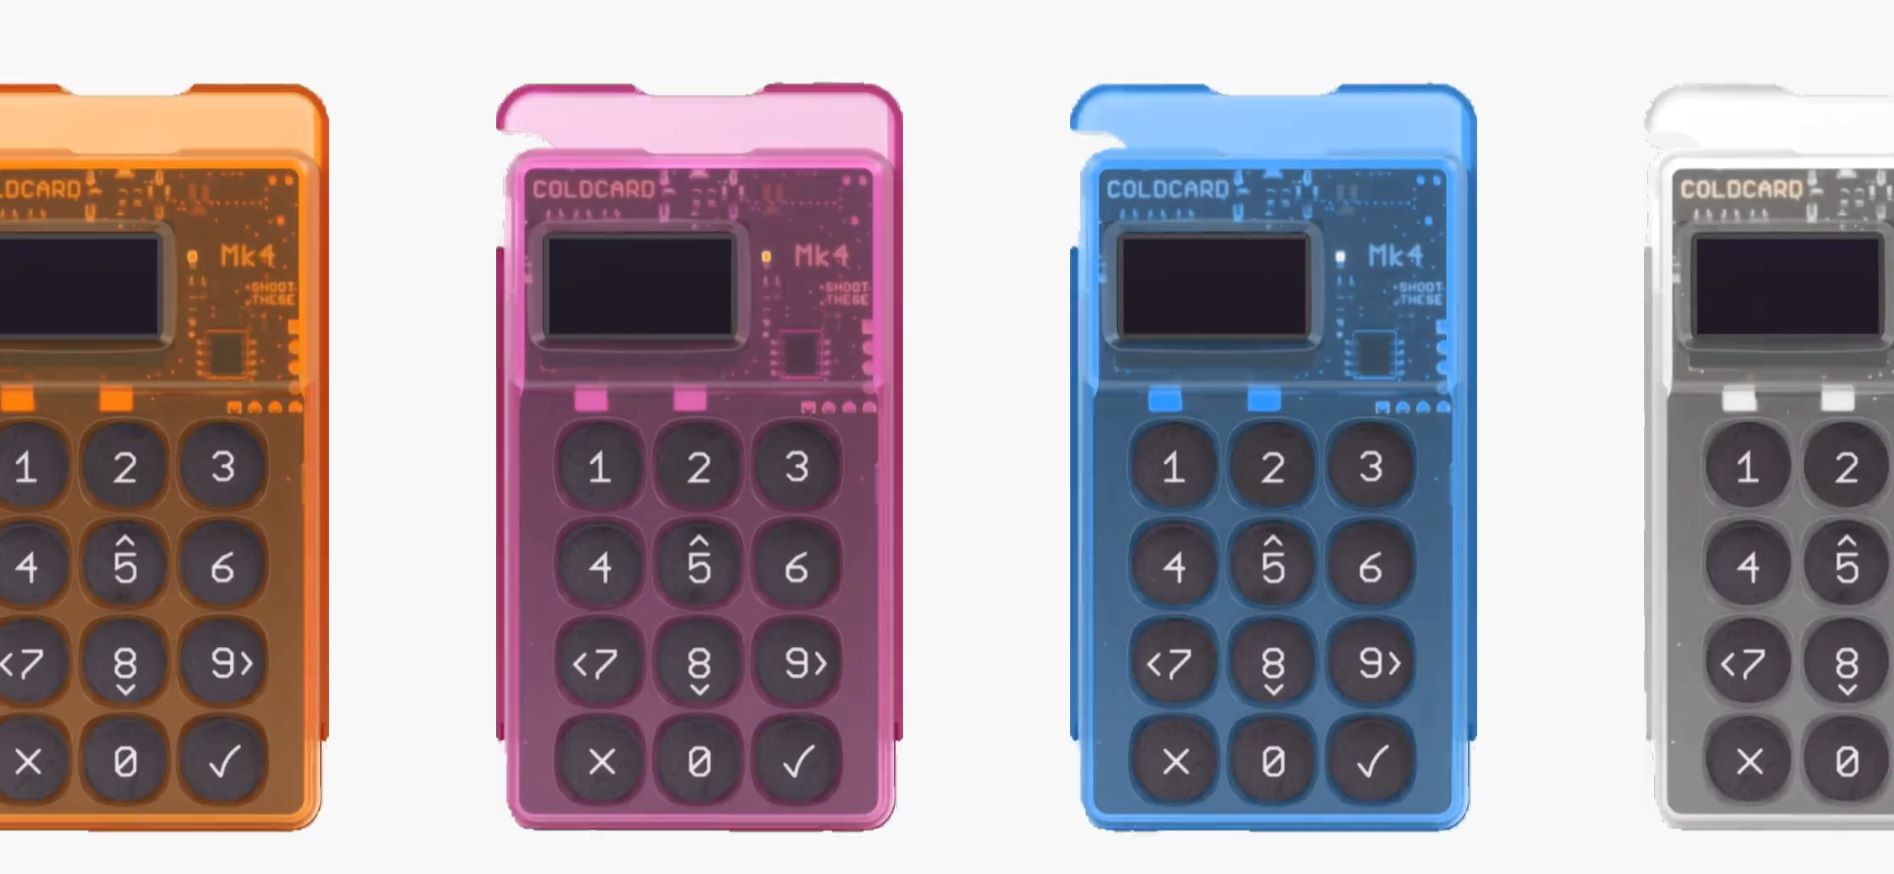
Despite its unassuming appearance (the classic version has a transparent case that shows the circuitry inside), the Coldcard MK4 is a bit of a beast under the hood. It has a fast 120 MHz processor, a 128×64 px OLED screen, and a full numeric keypad for input. The keypad makes it straightforward to enter PINs or numbers, though navigating letter-based menus (like naming a wallet or entering a passphrase) requires multiple key presses (à la old-school texting). There’s no fancy touchscreen or color GUI here – it’s intentionally simple, which in a way is part of its charm and security model.
How the MK4 Differs from Previous COLDCARD Versions?
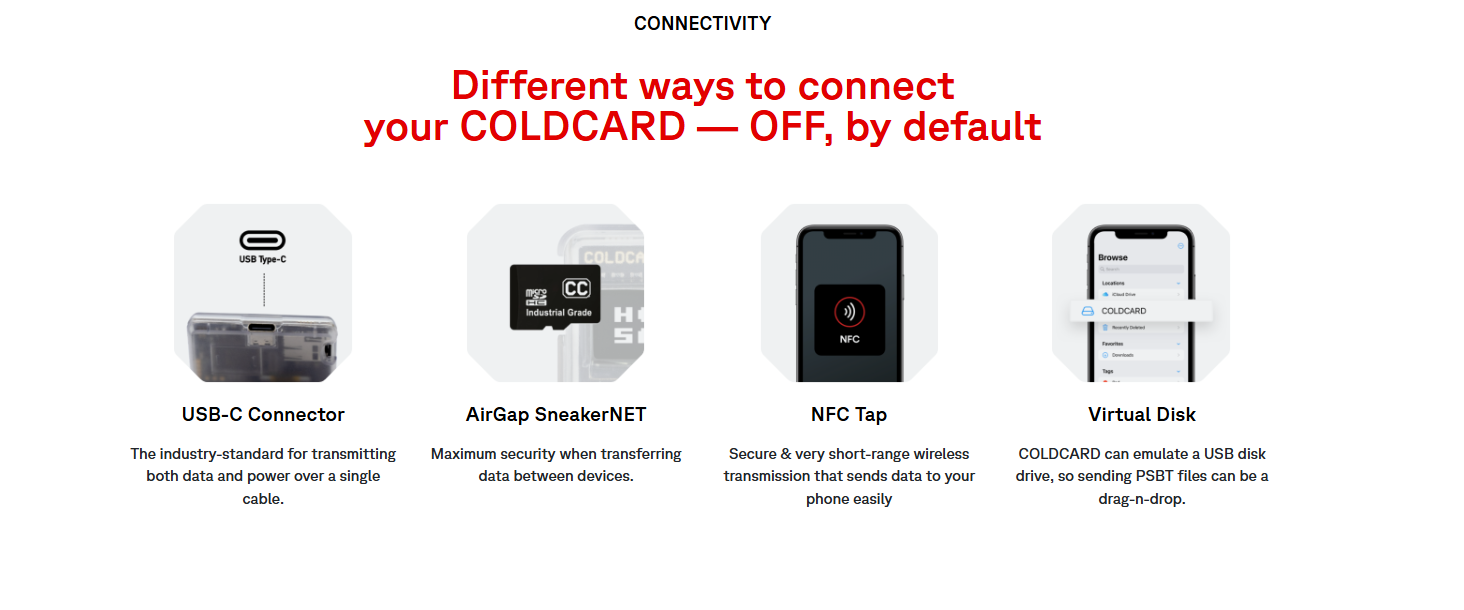
Having used an older Coldcard (MK3) before, I immediately noticed some improvements in the MK4. The most obvious change is the USB-C connector – the MK3 used a micro-USB port, so the upgrade to USB-C is welcome for durability and convenience. The MK4 also introduces an optional NFC capability for data transfer. By default, NFC is turned off (and you can even physically disable it by cutting a trace on the circuit board, if you’re ultra paranoid). But if enabled, it lets you simply tap the Coldcard to a phone or other device to share things like a Bitcoin address or sign a transaction wirelessly. This is a new avenue for air-gapped use that previous Coldcards didn’t have.
More Power
Under the hood, the MK4 is significantly more powerful. It boots up faster than the MK3 and sports a 120 MHz MCU (processor) vs. the 80 MHz in the older model. This means menus are snappier and, more importantly, signing transactions (especially complex ones) is quicker. The memory got a huge boost as well – the MK4 has 840 KB flash + 8 MB RAM, compared to the MK3’s 360 KB (and far smaller RAM).
In practical terms, this removes the transaction size limits that MK3 sometimes had (MK4 can handle up to a 2 MB transaction, versus 384 KB on the MK3). If you ever participate in large CoinJoin transactions or huge multi-sig transactions with many inputs, the MK4 will handle it gracefully where the MK3 might choke.
Better Security
Security-wise, the addition of the second secure element in MK4 is a major change. The MK3 had one secure chip; MK4 has two (from different manufacturers) working together. This change reinforces the “don’t put all your eggs in one basket” philosophy – if one chip had a vulnerability, the other chip (being a different design) likely wouldn’t share it. An attacker would need to compromise both chips plus the main processor to extract your keys. It’s a hefty upgrade for peace of mind.
Upgraded Firmware
The MK4’s firmware also supports multiple trick PINs (more flexible than the MK3). On the older version, you had a duress PIN and a BrickMe PIN, but the MK4 lets you set up additional trick PIN codes that can do things like show a fake balance, add a login delay, or even wipe the device immediately when entered. I found this out when exploring the MK4’s menu – it actually encourages you to consider setting up these pins as part of your security plan. It’s pretty wild (in a good way) that you can configure, say, one PIN that opens a decoy wallet and another that nukes the device, depending on the scenario.
Other Features:
Other quality-of-life improvements: Firmware updates on the MK4 are much faster – about 15 seconds, compared to a couple of minutes on the MK3. And the device now has a little LED light that blinks when USB is active. On my MK4, this LED is a tiny red light near the USB port that flickers if data is being transferred. It’s a subtle indicator, but useful to know if the device is communicating or truly idle (especially important if you’re only powering it and don’t expect any data connection).
Additionally, the MK4 introduced a feature called USB Virtual Disk Mode. When enabled, if you plug the Coldcard into a computer, it can appear as a read-only USB drive where you can drop transaction files (PSBTs) to be signed. I tried this out in a browser-based wallet – I enabled Virtual Disk mode, plugged in the Coldcard, and was able to save a PSBT from the browser directly to the Coldcard (which then I could sign and the signed file appears on the “drive”). It’s a neat alternative to juggling microSD cards, and of course this was not available on the MK3.
Physically, the MK4’s case design is slightly updated – it still has the transparent plastic shell (for the default model), but it feels a bit sleeker and sturdier. The buttons have a nice tactile response, similar to MK3, but the overall build quality seems improved. Coinkite (the maker of Coldcard) also released a bunch of new case colors with the MK4 (including a glow-in-the-dark version!).
My unit is just the standard clear one, but the fact that even aesthetics got some attention is interesting. Not a huge factor, but worth noting: MK4 has a sliding cover over the MicroSD slot now, whereas my MK3’s SD slot was just open. The little slide cover helps keep dust out and also can act as a write-protect if you tape it over (I guess that’s the idea).
To sum up the differences: the Coldcard MK4 is basically a faster, more secure, and more feature-rich upgrade over the MK3. It retains the core philosophy (Bitcoin-only, air-gapped, hardcore security) but smooths some rough edges and adds new capabilities like NFC and more memory. If you’re coming from a MK3, MK4 will feel familiar, but you’ll appreciate the quicker operations and extra safety measures built in.
COLDCARD Setup Experience – From Unboxing to Wallet Creation
My Coldcard MK4 arrived in a small padded envelope directly from Coinkite (the manufacturer, based in Canada). Inside was a bright tamper-evident bag with a tear-off top. The bag had a bold Coinkite logo and a unique serial number printed on it. Before doing anything, I noted the serial number and inspected the bag – everything was intact, no signs of tampering. This is important because that number isn’t just for show: when I powered on the Coldcard for the first time, the device’s screen displayed the exact same serial number to confirm it matched the bag. Sure enough, it did. I really appreciate this little verification step – it gave me confidence that the device hadn’t been swapped or meddled with in transit. (Lesson learned: don’t throw away the bag immediately; check the number first!).
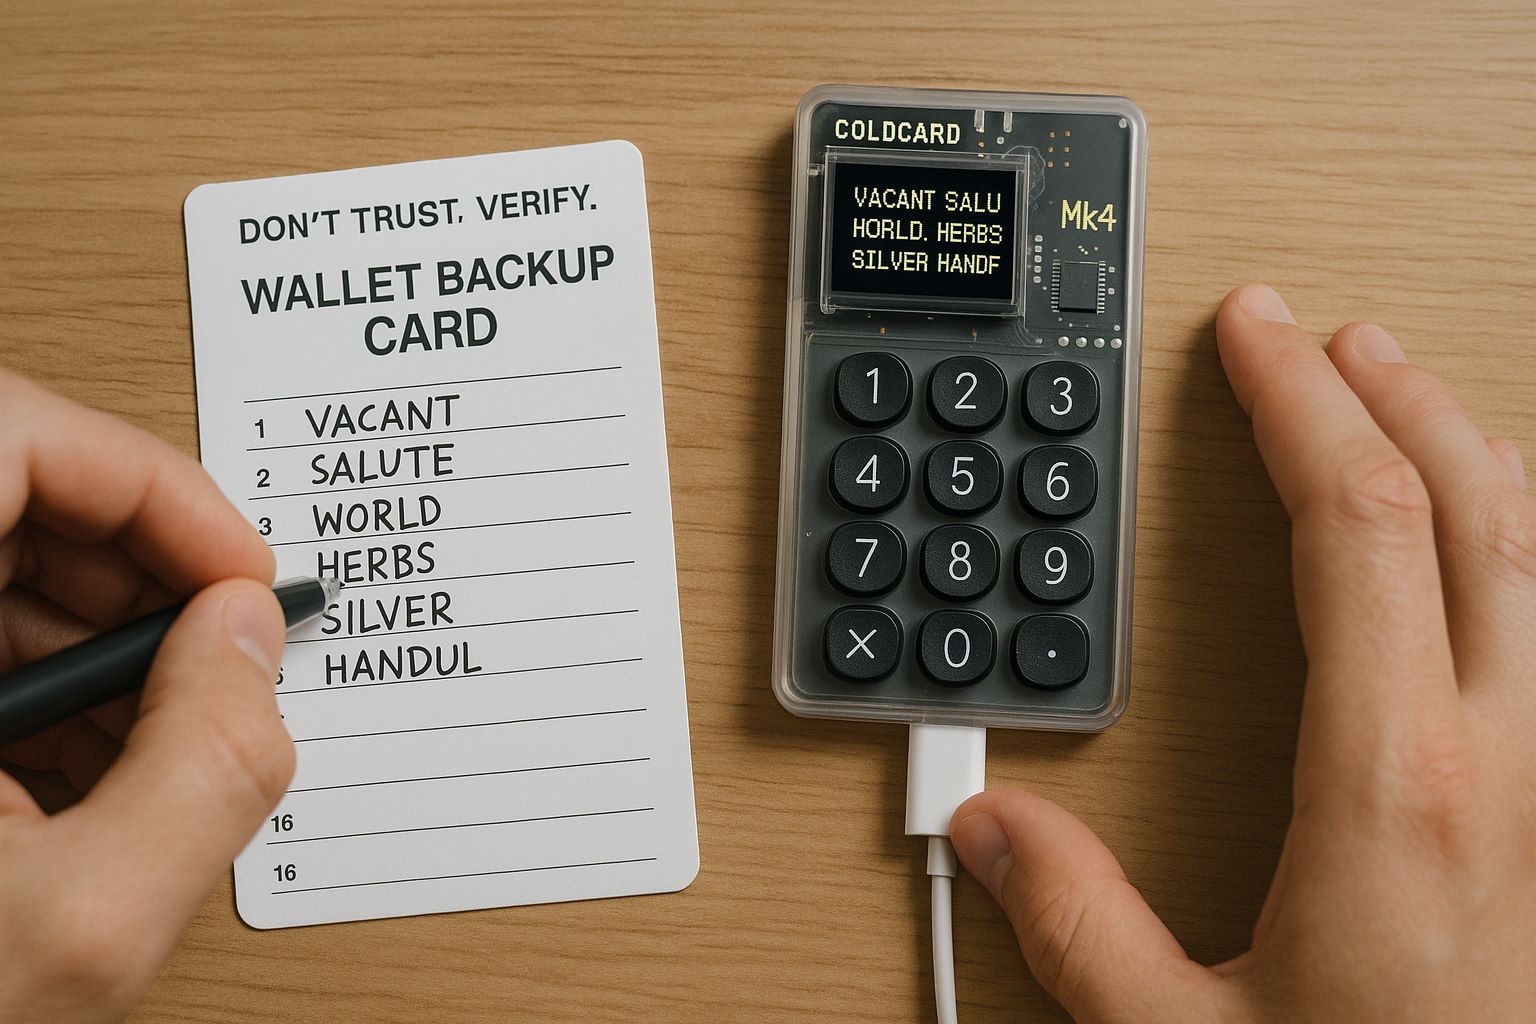
Opening the bag
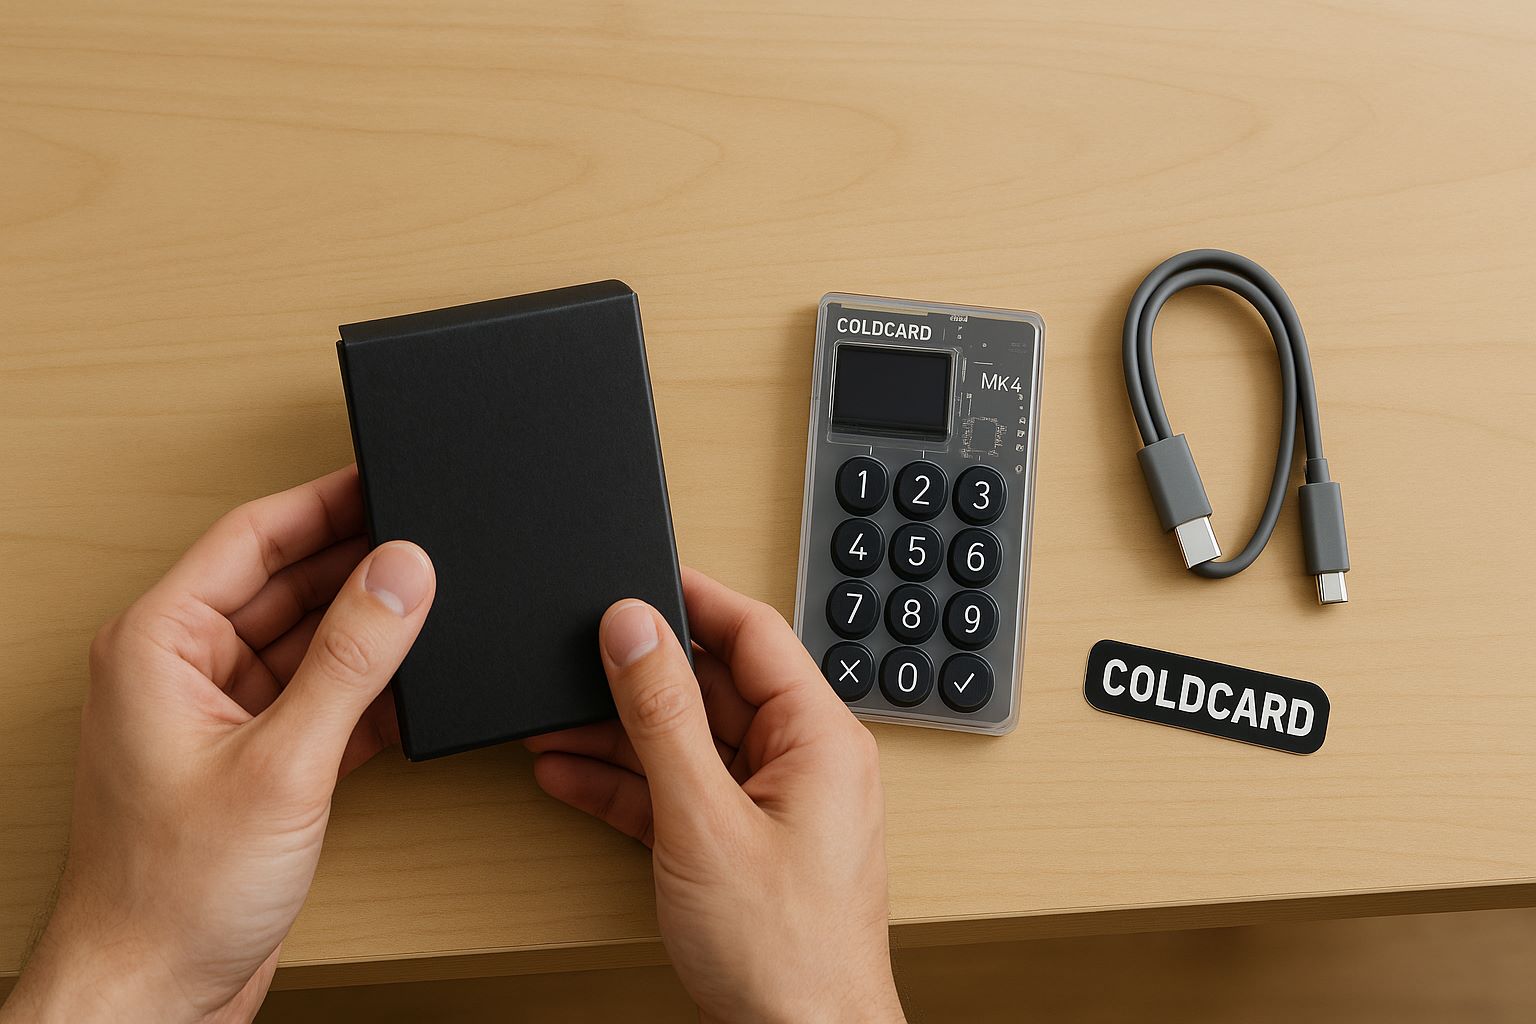
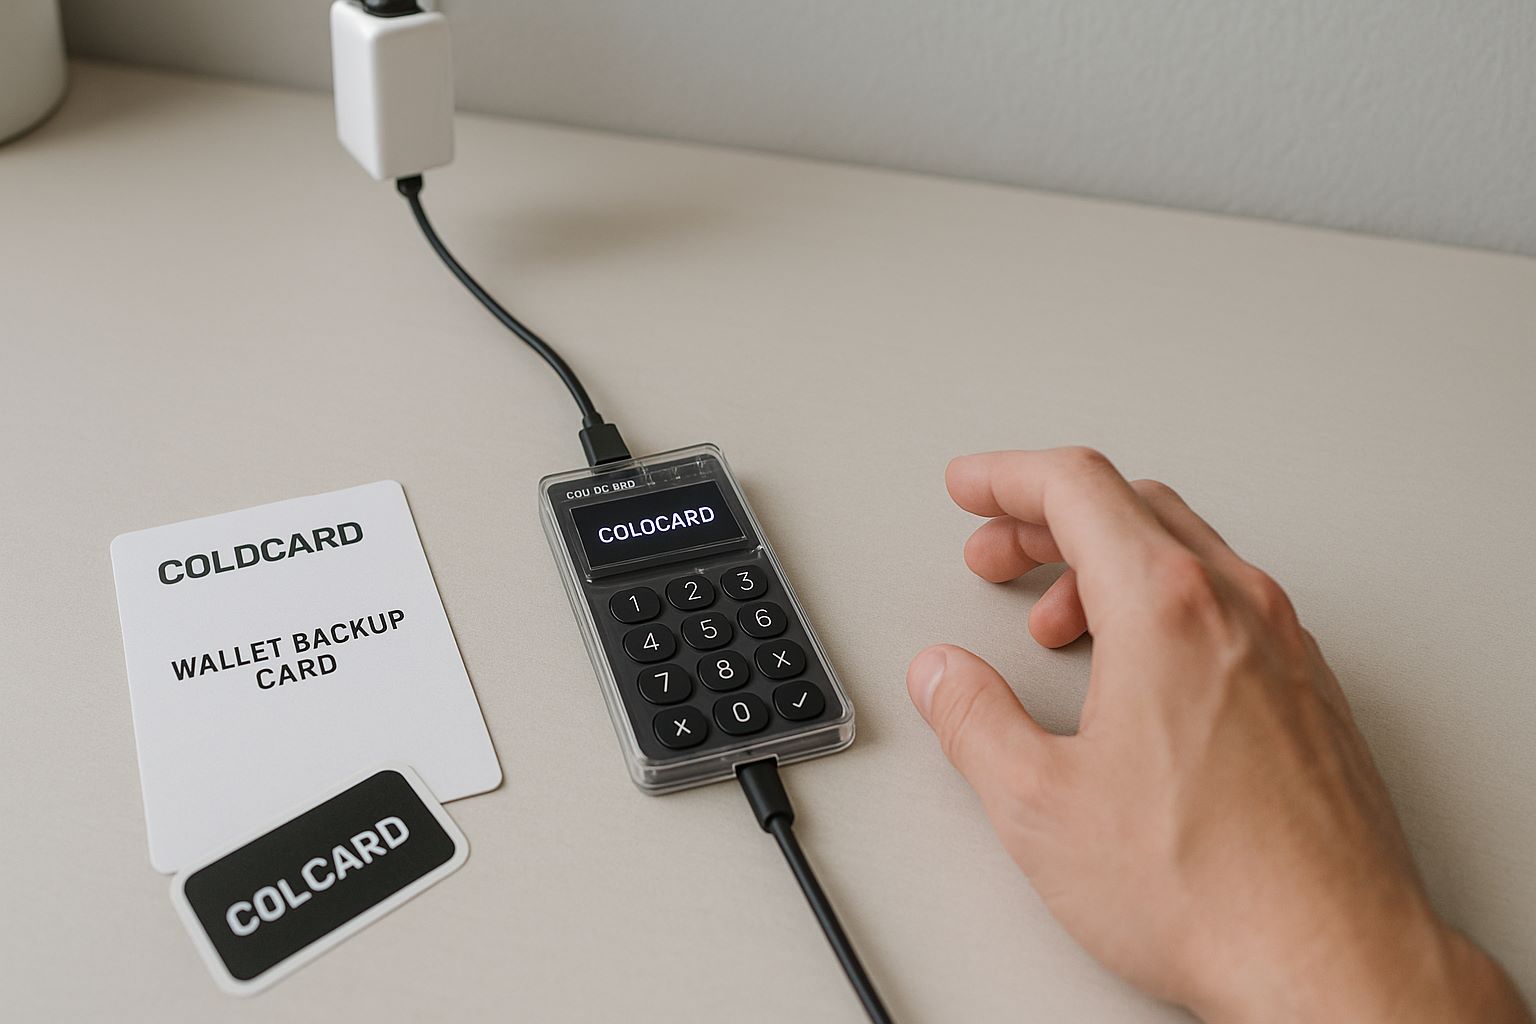
I found the Coldcard unit itself, a paper “Wallet Backup Card” for writing down my seed words and PIN (titled with the cheeky phrase “Don’t Trust. Verify.”), and a couple of Coldcard stickers. There’s no USB cable included (Coinkite sells those separately), so I grabbed a USB-C cable from my drawer to get started. You can power the Coldcard either by plugging it into a computer’s USB port or just a wall charger or battery pack (if you truly want no data connection). For setup, I actually used a plain USB wall charger – this way I was certain no computer was talking to it during initial setup.
When I powered Coldcard on
After the bag number check, I was greeted with a welcome screen and had to agree to some cheeky Terms of Sale (basically acknowledging that if I lose my PIN or data, it’s on me – standard stuff). Then came the task of setting up my PIN code. Coldcard uses a two-part PIN (they call it prefix and suffix). I entered a four-digit prefix, and the device then showed me two random English words on the screen.
These are the anti-phishing words. The idea is, whenever I log in in the future, after entering that first part of the PIN, the same two words will appear. If I were using a fake Coldcard (or someone had tampered with mine), it wouldn’t know my prefix and thus would show different words – a red flag. I wrote down those two words on the provided card (in the space labeled “Anti-phishing Code Words”).
Next, I entered the second part of my PIN (another four digits) and then confirmed the full PIN by entering it all again. The whole PIN setup is a bit more involved than on a Trezor or Ledger (which usually just have you input a single PIN once or twice), but I understood why – it’s adding that extra security check. I chose an 8-digit PIN in total (4+4). You can actually choose between 2 and 6 digits for each part, giving flexibility in PIN length (the max would be 12 digits total).
With the PIN set
The Coldcard rebooted and prompted me to either create a new wallet (generate a new seed phrase) or import an existing one. I opted to create a new wallet because I wanted a fresh start. The device asked me how many words I want for my seed (I went with the default 24-word seed, which is standard for Bitcoin).
It then generated the 24 seed words and displayed them on the screen, one by one. I wrote each word down on the paper backup card. The screen is small (only fits one word at a time clearly), so this took a few minutes as I carefully copied them. After scrolling through all 24, the Coldcard actually quizzes you by asking for a few specific words (e.g., “Confirm word 5”, “Confirm word 18”) – I had to select the correct word from a list for those positions. This ensures you wrote them correctly. I admit, even as a fairly experienced user, I was a bit nervous on this step – if you get it wrong, it would make you redo the backup process. Fortunately I got them all correct on the first try.
One very cool option during setup:
The Coldcard lets you add your own entropy (randomness) to the seed by rolling a dice. I saw this in the menu – you can literally take a six-sided die, roll it 99 times, and input the results, and it will mix those into the seed generation. I didn’t do the full 99-roll thing this time (I trusted the Coldcard’s internal randomness which is probably fine), but I did play with entering a few rolls just to see how it works. It’s a fun feature for the ultra careful folks who want to be 100% sure the seed is random. Coldcard even provides a way to verify the math of the dice roll entropy later, which speaks to the transparency they go for.
With seed created and backed up, the Coldcard generated my Bitcoin addresses (really an extended public key) for receiving funds. It doesn’t show all addresses on the device at once – typically you’d export the public key or use software to manage addresses – but the Coldcard can display any specific receive address on-screen if you want to verify it. I played around in the Address Explorer menu to view the first receiving address and compare it with what my software wallet showed, and it matched perfectly.
All in all, the setup process – from unboxing to having a ready-to-use Bitcoin wallet – took me maybe 15-20 minutes, unhurried. It was smooth, though definitely more hands-on than some simpler wallets. I had to interact with the device quite a bit (entering PIN parts, writing down words, confirming them).
But at the end of it, I felt in control and aware of the critical information (my PIN and seed words) rather than the device doing things behind the scenes. One minor quirk: the Coldcard’s screen is small, and sometimes messages scroll if they’re long. During setup, there were a couple of info screens where I waited a second to see the full sentence scroll by. Not a big deal, but patience is required.
Finally, I set up a BIP39 passphrase
Which I use as an extra password on the seed. This wasn’t strictly part of the basic setup, but the Coldcard supports it and I like the added security of a passphrase (it creates a different wallet if the passphrase is entered, essentially adding a second factor). The Coldcard makes it easy to enable – you just toggle passphrase on, and then you can enter a custom passphrase whenever you unlock the wallet. I tested that too, and decided on one to use going forward.
With that, my Coldcard MK4 was fully initialized and ready. The whole experience felt like setting up a high-security device – a bit more complex than, say, initializing an iPhone – but it was clearly focused on making sure I, the user, verify each step (bag number, words, etc.). As someone who appreciates security, I actually enjoyed this thorough process.
COLDCARD User Experience – Navigation, Security Features, Quirks, and Standouts
Once the Coldcard MK4 was set up, I started using it to manage some test Bitcoin funds. One thing became clear right away: this device is built for security, not convenience. That’s not a knock on it, just an observation. The user interface is Spartan – mainly text menus on a tiny screen – and the workflow often assumes you’re okay with doing things “the long way” if it’s safer. As a techy Bitcoiner, I kind of love this, but it does come with some quirks.
Navigation and interface:
Using the Coldcard feels a bit like using a late-90s device. The menu is hierarchical and you use the number keys to scroll or select options (there’s an “OK” checkmark key and a “X” cancel key as well). For example, the main menu has options like Address Explorer, Ready To Sign, Settings, Advanced, etc. Each is numbered, so you can press that number to jump there, or use up/down keys (7 and 9 double as arrow up/down). It’s not a touch interface – you’re physically clicking buttons – which actually results in fewer input errors for me (no mis-taps).
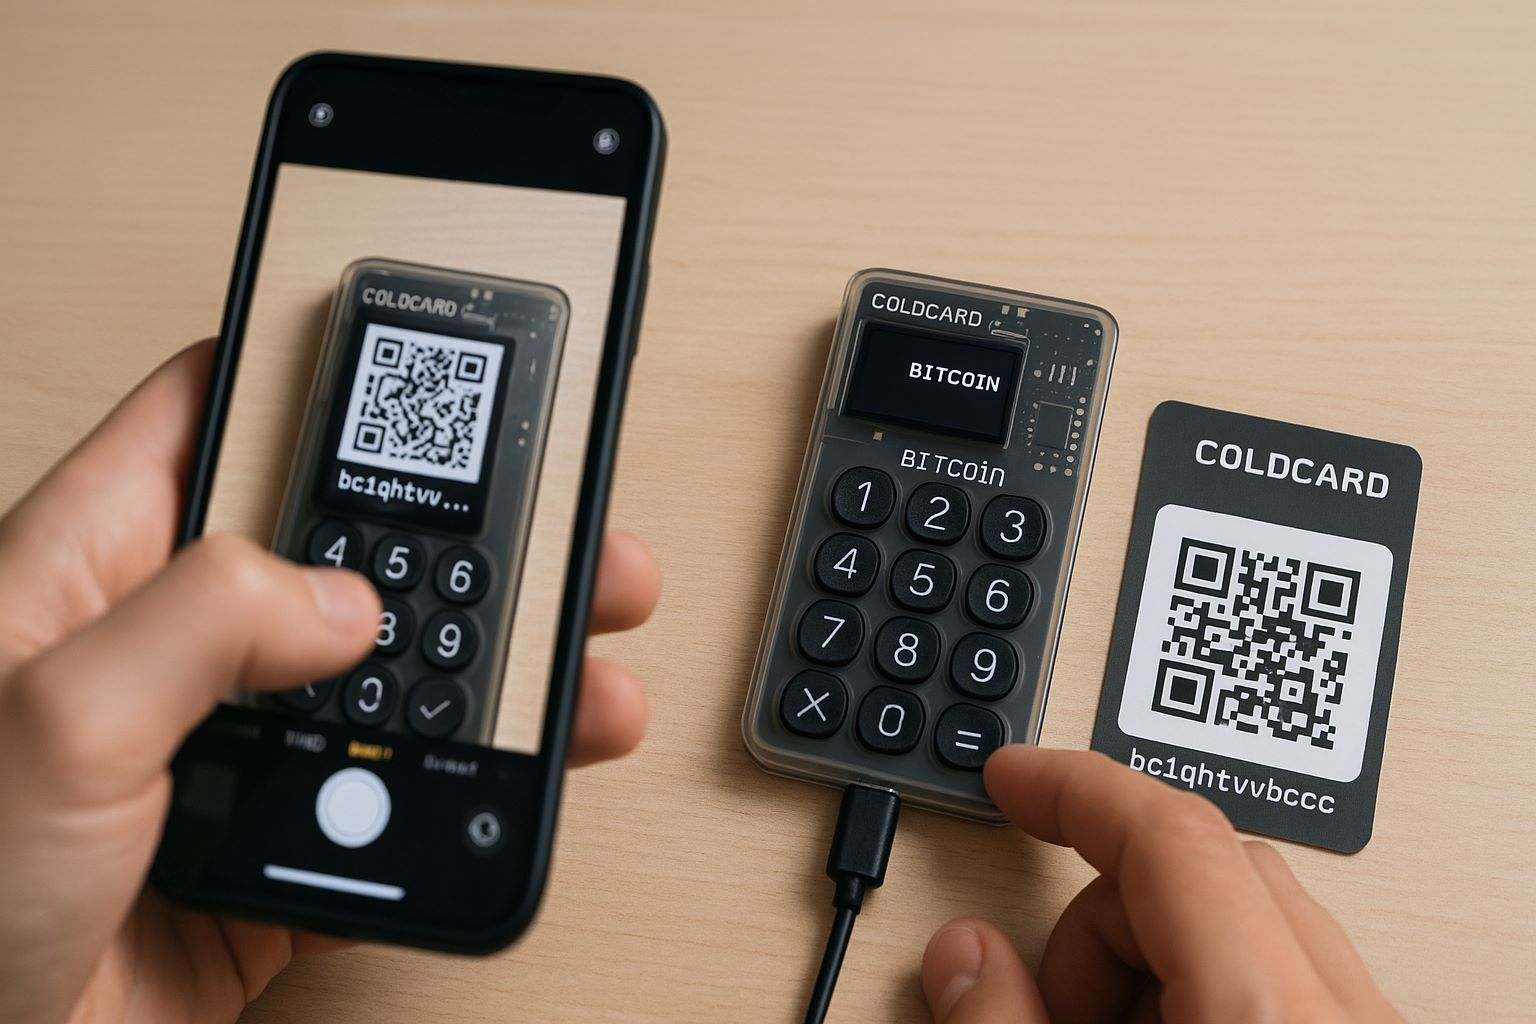
The screen, as mentioned, is a small monochrome OLED. It can display about 4 lines of text at a time. If something is longer (like a full Bitcoin address), it will scroll automatically. I found the screen adequate for confirming things like addresses, but for very long strings (hex data or PSBT details), it’s a bit of a letterbox view. Still, the important parts (like checking the first and last bits of an address) are doable. It even shows a QR code on screen for your receiving address if you want (scanning that with my phone worked fine, though the QR is small so you have to bring the phone close).
Security prompts
The Coldcard MK4 is constantly reminding you about security. Every time I power it on, I enter my PIN prefix, then see those anti-phishing words (which I check against what I wrote down initially), then enter the PIN suffix. This login sequence adds maybe 5-10 seconds compared to a normal single PIN entry, but I’ve gotten used to it and it reassures me I’m on the right device.
If you mess up the PIN, it implements a brief delay that grows with each wrong attempt (to foil anyone trying lots of combinations). One interesting feature I enabled in settings is the Login Countdown – just to try it. This makes you wait a set time after entering PIN before it unlocks (like a vault door timer). I only set a 10-second delay, as a test. It’s another example of Coldcard’s focus: you can add all these little booby traps if you want. I eventually turned that off (didn’t need it in my case).
Using with software
Because the Coldcard has no native app or wallet software of its own (Coinkite doesn’t provide a fancy GUI for it), you rely on third-party wallet software. I primarily used Sparrow Wallet on desktop and also tried it with Electrum. The integration was relatively painless. For the online software wallet, you have two ways to connect the Coldcard: USB mode or microSD card.
In USB mode, Coldcard can work with wallets using HWI (Hardware Wallet Interface) or the new USB Mass Storage mode. For example, in Sparrow I was able to connect the Coldcard directly via USB – Sparrow detected it (after I installed the Python libraries for Coldcard support) and I could fetch the XPUB (the extended public key) to import my account. Once that was done, Sparrow knew my addresses and could track balances.
When I wanted to send a transaction, Sparrow would hand it off to the Coldcard for signing. Specifically, Sparrow would either use the HWI interface (which means Sparrow communicates with the device through the USB cable and the device asks me to approve the transaction on-screen) or, if I wanted to simulate full air-gap, I could have Sparrow save a PSBT file that I move via SD card.
I tried the SD card method to see how air-gapped operation feels. It’s a bit old-school but actually very straightforward: Sparrow generated a PSBT file (basically the unsigned transaction data) and I saved it onto a microSD (I have a tiny 1GB card for this). I then took the card out of my PC and inserted it into the Coldcard’s slot. On the Coldcard, I went to Ready To Sign -> From SD and it found the PSBT file and displayed the transaction details (amount, destination address) on the screen for me to review.
I confirmed on the Coldcard to sign it. It wrote a new file back to the SD card (the signed PSBT). I moved the card to the PC and Sparrow picked up the signed file and broadcast the transaction. Whew! That’s a lot of steps to describe, but each step is simple; it’s just a manual sneakernet process. Honestly, it felt pretty empowering to see that it works exactly as designed – the Coldcard never needed an active connection to the computer at all. (If this sounds tedious, remember you can also just plug it in and do the USB method which is quicker; I wanted the full air-gap experience.)
One standout security feature during use: the Coldcard will verify addresses on-screen. For instance, when I wanted to receive Bitcoin, Sparrow gave me a deposit address. I could cross-verify that address by using Coldcard’s Address Explorer (it can display my receive addresses in order). This ensures the software (Sparrow) or my PC couldn’t have been compromised to show me an incorrect address (a common attack with malware is to swap out addresses). Seeing the address on the Coldcard’s trusted screen gave me confidence to proceed. It’s something I consider a must for any hardware wallet – always verify receive addresses – and Coldcard handles it well, albeit in a very bare-bones way (scrolling text).
Quirks and what stood out?
The Coldcard MK4 stands out as a no-compromise security device. Navigating its menus and using it day-to-day requires a bit of patience and knowledge, but it rewards you with a strong sense of security. I actually found that using it made me more thoughtful about my Bitcoin transactions (which is probably a good thing). There’s no impulse tapping “send” – you have to really intend to move funds because you’re going through the deliberate signing process.
Bitcoin-only Platform
One quirk is that the Coldcard, being Bitcoin-only, will sometimes use terms or assume knowledge that might confuse newcomers. For example, when setting up, it asked if I wanted to use “BTC paycode” or specific derivation paths – things a beginner likely doesn’t understand. It doesn’t hold your hand as much as, say, a Ledger Live interface which hides derivation paths and such. In my case, I do understand those, but I can see how a first-timer might be a bit intimidated.
In fact, I recall a Reddit user saying the Coldcard “asks you things like the scrypt and derivation that you will use (no idea what that is)” – which rings true for less technical users. So user-friendliness is not its strong suit. Coinkite even kind of acknowledges this; they target the Coldcard at power users and Bitcoin enthusiasts. If you’re not somewhat familiar with Bitcoin basics, you might find the Coldcard’s language and operation challenging. It’s not that it’s exceedingly difficult – it’s just very manual. There are no colorful icons or tutorials on the device itself.
Plenty of Customization Features
Another thing that stood out is how much customization the Coldcard offers in settings. Browsing through the menus, I found options for setting up a login countdown (as mentioned), enabling/disabling USB data, turning on NFC (off by default, I left it off for now), setting up microSD 2FA, and even a blunt setting called “Brick me now” if you want to intentionally destroy the secure elements at that moment. I of course did not try that! But knowing it’s there weirdly adds to my peace of mind – if I ever needed to, I could irreversibly brick the device (though I’d never do that unless my coins were safely moved or I had the seed backed up elsewhere). The MK4 also has a secure secret storage feature where it can store a small secret or password (like 100-something bytes) in the secure chip, separate from your seed. Some people use that to store a backup of a seed for another wallet or other secret notes. I toyed with storing a short message in it and retrieving – kind of fun, though I don’t have a strong use case for it myself yet.
Reliable and bug-free
One pleasant surprise: even with all these features, the device’s operations were reliable and bug-free in my usage. I half-expected to hit some glitch given how many “advanced” things it can do, but every step (address verification, PSBT signing, etc.) worked flawlessly. This might be thanks to the Coldcard being a mature product line (MK4 builds on prior versions) and the open-source community testing it. The firmware updates are also regular – I did one update (to version 5.x firmware) during my review period, which went smoothly (took about 10-15 seconds over USB, confirming the improvement in upgrade speed).
On the downside, one could consider it a “con” that the Coldcard doesn’t support any coins besides Bitcoin. In my personal use, that’s fine (I pretty much only needed Bitcoin support in this wallet). But if you have a diverse crypto portfolio, Coldcard won’t help you with Ethereum, tokens, or anything non-Bitcoin. Those users would need a separate device or a different multi-coin wallet. Another slight inconvenience: the Coldcard’s need for external tools (software wallet, maybe an SD card, maybe a power-only cable) means there’s a bit of a kit to maintain. For instance, I added a specific microSD and a microSD-to-USB adapter to my keychain so I can easily move files if needed. It’s not hard, but it is more gear compared to a Ledger Nano that just plugs in and uses one app.
Battery Lifetime
One of the coolest moments I had was testing the Coldcard with a 9V battery. I bought the optional Coldpower adapter (a little board that connects a 9-volt battery to the Coldcard’s USB port for power). I plugged it in, flipped a switch on the Coldpower (it even has a “tin-foil mode” label, ha!), and the Coldcard booted up powered purely by the battery – no computer or outlet at all.
Using a 9V battery and the Coldpower adapter to run the Coldcard completely offline. This truly air-gapped setup let me sign a transaction while the Coldcard was not physically wired to any computer. I then used the microSD to transfer the signed transaction. It’s an extreme setup perhaps, but it demonstrates how far you can go: you can operate the MK4 in a Faraday bunker with just a battery and SD card and still use Bitcoin. As an experience, it was geeky and satisfying.
Is it perfect? No – things like lack of native app, a clunky UI by modern standards, and Bitcoin-only limitation are points to consider. But in terms of accomplishing what it sets out to do (securely store and use Bitcoin with minimal trust in computers), the MK4 absolutely shines. It’s clear that a lot of thought has been put into every little corner of its functionality with security in mind. From the perspective of an experienced user, I actually enjoy these “quirks,” but newcomers should be prepared for a learning curve. As long as you know what you’re getting (this isn’t trying to be a glossy consumer gadget), the Coldcard MK4 provides a rock-solid experience for its niche: Bitcoin security maximalists.
COLDCARD vs Trezor vs Ledger Comparison
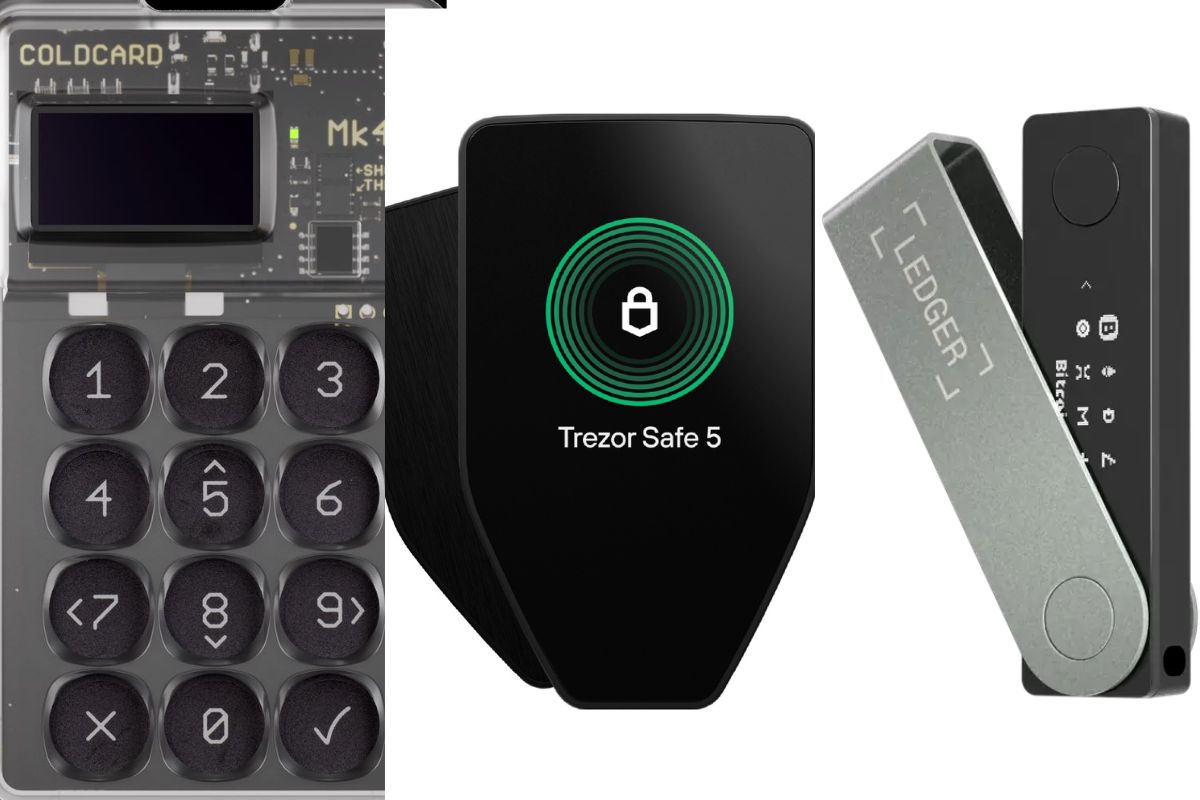
How does the Coldcard MK4 compare to popular hardware wallets like Trezor and Ledger? Having used all three, I can say they each cater to different needs and philosophies. Here’s a breakdown and a quick comparison table:
Security Model
Coldcard is all about Bitcoin security. It’s built with secure elements, no USB data (if you choose), and the option to never connect it to an internet device. Trezor (especially the Model T) is also secure but notably does not use a secure element chip – it’s entirely open-source hardware, which is a different approach (some prefer Trezor’s openness, but it means if someone steals your Trezor device, they might have an easier time extracting the seed compared to a Coldcard or Ledger). Ledger devices do use a secure element and have strong physical security, but their firmware is not fully open source, which means you have to trust Ledger’s code somewhat blindly. Coldcard’s firmware is open source, so there’s more transparency.
Coins Supported
This is a big one – Coldcard only supports Bitcoin. No Ethereum, no altcoins, no NFTs. Trezor and Ledger, on the other hand, support a wide array of cryptocurrencies (hundreds or even thousands). If you need one device for all your different coins, Coldcard won’t fit that bill at all. Trezor and Ledger both shine in multi-coin support, with Ledger probably leading in sheer number of supported assets (thanks to third-party apps).
User Experience & Interface
Trezor (particularly the Trezor Model T) has a full-color touchscreen and a very user-friendly interface. Its companion software (Trezor Suite) is polished and great for beginners. Ledger devices (like Nano X) have a small screen and two buttons, which can be a bit awkward, but the Ledger Live app is also quite user-friendly for basic operations. Coldcard’s user experience, as described, is more utilitarian and will feel “techy”. There’s no official app; you’ll use it with third-party wallets like Sparrow, Electrum, or Specter. This means a bit more setup and knowledge required from the user, whereas Trezor/Ledger guide you through the whole process with their own software. On the flip side, using third-party software with Coldcard gives you more choice and control (you can pick an interface you like, such as a desktop app or even just command-line if you wanted).
Connectivity
Ledger Nano X offers Bluetooth (you can use it with a mobile phone without a cable). Trezor does not have wireless – it’s USB only. Coldcard offers an interesting mix: USB and MicroSD, and now NFC on MK4. It intentionally has no Bluetooth (to avoid that wireless attack surface). So, mobility-wise, if you wanted to use a phone, Coldcard would require either plugging in via an adapter (some Android phones can connect USB drives/OTG) or using NFC with a supported mobile app (few mobile wallets support Coldcard NFC yet, but I suspect more will come). Ledger’s Bluetooth is convenient for on-the-go phone use, but some see it as a security risk (Ledger of course encrypts the BT connection, but purists prefer no wireless at all).
Backup and Recovery:
All three use BIP39 seed phrases, so backup is similar (write your 24 words, etc.). Trezor offers Shamir backup (splitting seed into multiple shards) on Model T as an advanced option. Coldcard offers its own twist: you can backup the seed to an encrypted file on microSD (with a passphrase) if you want, and even a seed XOR method (splitting seed into multiple parts, similar idea to Shamir). Ledger relies on standard seed backups (24 words on paper) only. So Coldcard does have some powerful backup schemes if you take the time to use them.
Here’s a quick comparison table summarizing key points:
| Feature | Coldcard MK4 | Trezor Model T | Ledger Nano X |
| Supported Coins | Bitcoin only | 1000+ (BTC, ETH, tokens, etc.) | 5000+ (BTC, ETH, tokens, etc.) |
| Open Source | Yes – firmware is fully open-source | Yes – hardware & firmware open-source (community audited) | Partially – app open, firmware closed source |
| Secure Element | Yes (2 secure chips in MK4) | No (secure MCU, but no dedicated SE) | Yes (proprietary secure chip) |
| Air-Gapped Use | Yes – via microSD or power-only mode (never needs USB data) | No – must connect via USB to sign | Limited – no airgap (USB or Bluetooth only) |
| Connectivity | USB-C, MicroSD, Optional NFC (no Bluetooth) | USB-C (no wireless) | USB-C, Bluetooth available |
| Display & Input | 128×64 OLED, physical numeric keypad | Color touchscreen LCD | 128×64 OLED, 2 buttons |
| Ease of Use | Steep learning curve; use with external software (advanced user focus) | Very user-friendly via Trezor Suite; on-screen prompts | User-friendly via Ledger Live; device navigation can be fiddly |
| Price (approx.) | ~$150 (device only) + accessories | ~$219 (Model T); ~$70 (Trezor One) | ~$149 (Nano X); ~$79 (Nano S Plus) |
(Prices as of this writing; Coldcard often sold in USD, Trezor/Ledger in various retailers.)
As the table shows, the coldcard wallet is in a category of its own when it comes to Bitcoin-focused security, whereas Trezor and Ledger aim to balance security with multi-coin convenience and slicker UX. In my personal use: if I’m dealing with just Bitcoin and want maximum security, I reach for the Coldcard. If I needed to manage a bunch of different assets or wanted a quick plug-and-play experience, I might opt for a Ledger or Trezor for those specific purposes.
It really comes down to the user: The Coldcard MK4 is ideal for someone who says “Bitcoin is my primary asset and I want the most secure setup possible, even if it’s a bit complex.” Trezor is great for someone who values open-source and an easy interface (and doesn’t mind the absence of a secure element). Ledger is often chosen by those who want a secure element and wide coin support in a more consumer-friendly package (though you do trade off transparency). Each has pros and cons, which leads us to the next section.
Pros and Cons of the COLDCARD MK4
Pros:
- Top-notch security design: True air-gap operation with PSBT; no computer needed to sign transactions. Dual secure elements and robust PIN tricks provide strong defense.
- Bitcoin-only focus: Simpler codebase and no exposure to altcoin software bugs or supply-chain attacks related to other coins. It’s built by Bitcoiners for Bitcoin.
- Open-source firmware: Community-reviewed code adds transparency and trust. You’re not reliant on secret code for your wallet’s security.
- Advanced features: Supports multi-sig, passphrases, dice-roll entropy, duress wallets, and more. Great for power users who want granular control.
- Expandable/Offline storage: MicroSD slot allows easy backups and transaction transfer. You can save encrypted backups of your seed to SD card or even use it for 2-factor checks.
- No PC required: Can be powered by a battery (with adapter) and used standalone. This is as cold as cold storage gets.
Cons:
- Not newbie-friendly: The interface and setup assume some knowledge. There’s a learning curve. No polished companion app or guidance wizard.
- Bitcoin only: Useless for other cryptocurrencies. If you need to manage altcoins, you’ll need a different wallet – Coldcard won’t do it.
- Manual operation: Using SD cards or external software for transactions is less convenient than one-cable solutions. More steps = more chances to make a mistake if you’re not careful.
- No native UI application: You have to rely on third-party wallets (which, while excellent, add a layer of complexity). There’s no official mobile app or desktop client from Coinkite.
- Additional accessories often needed: To fully utilize air-gap, you might buy a power-only USB cable or the Coldpower adapter, and a good SD card. This adds to the cost and kit.
- Small screen for long data: Verifying long addresses or output details requires scrolling and attention. It works, but it’s not as nice as having a bigger screen (like on some competitor devices).
Coldcard Review: Is MK4 Worth It?
In my personal opinion, yes – the Coldcard MK4 is worth it for users who prioritize security above all else. After using it extensively, I feel a high degree of trust that my Bitcoin are safe, even if my PC were to be infected with malware. The combination of physical security measures and the peace of mind from the air-gapped workflow is hard to put a price on. That said, it’s not worth it for everyone. If you’re the type of person who just wants a quick, easy hardware wallet to store a mix of coins, the MK4 will likely feel like overkill (and you’d be paying for features you don’t use).
For me, as someone who holds Bitcoin for the long term, the Coldcard’s value shines through every time I use it. There’s a bit of delight in its “no-nonsense” approach – it’s almost like using a classic tool in a modern world. No flashy animations, no distracting altcoin tokens, just me and my Bitcoin transactions, with full control. I find that it encourages good security habits: I double-check addresses on the device, I’m mindful of where I keep my backup, and I know that even if someone got physical access to my Coldcard, my trick PIN setups and the secure elements would give me some defense.
From a cost perspective, the device is priced around $150. In the realm of hardware wallets, that’s reasonable (cheaper than a Trezor Model T, on par with Ledger Nano X). But you might need to add a microSD ($5-10) and possibly a power-only cable or battery adapter if you want to use those methods. So call it ~$170 all-in for a robust setup. In return, you get a device that is likely to last many years (the MK3 served people well for several years before MK4 came out) and can adapt to various security schemes you might employ (multisig, etc.).
I also consider the community and support around Coldcard. Coinkite has been around for a long time and they actively maintain the firmware. The user community (on Twitter, Reddit, etc.) is passionate and knowledgeable. If I ever have an issue or question, I’m pretty confident I can find help or documentation. This isn’t a fly-by-night product; it’s one of the more respected Bitcoin security devices out there.
So, is the Coldcard MK4 worth it? For a hodler who values security and is willing to put in a bit of effort – absolutely. It’s an investment in peace of mind. I sleep a little better knowing my Coldcard (with my coins) is safely stored away, with all its defenses at the ready. If you’re not that person, you might be happier with a more user-friendly wallet. In my case, I have no regrets choosing the Coldcard. It fits my needs perfectly, and the minor inconveniences are a trade-off I’m happy to accept for the security gained.
Final Words on Coldcard
Wrapping up, my journey with the Coldcard MK4 has been eye-opening and confidence-inspiring. This device is certainly not aimed at the casual crypto user, but for those of us who live and breathe Bitcoin, it feels like having the ultimate vault in the palm of your hand. I’ve come to appreciate the deliberate pace and manual checks – they force me to be mindful and deliberate with my coins, which is how it should be when security matters.
The Coldcard MK4 isn’t flashy. It won’t wow you with a fancy interface or support every coin under the sun. What it will do is provide a level of security and control that is hard to find elsewhere. I’ve tried to highlight both the good and the bad in this review, and ultimately, for me, the good far outweighs the inconveniences. Using the Coldcard feels like being in control of my Bitcoin destiny: I verify everything, I hold the keys, and I dictate the terms of how my transactions are made.
If you’re considering a Coldcard MK4, ask yourself what you value most. If the answer is “security and sovereignty, even if it means a bit of extra work,” then I can wholeheartedly recommend it. If you need ease-of-use or multi-asset support, you might look at alternatives. In my case, the Coldcard MK4 has earned a permanent spot in my crypto toolkit. It’s a device built by Bitcoiners for Bitcoiners, and that ethos comes through in every aspect of its design.
Hopefully, this coldcard wallet review gave you a clearer picture of what using the MK4 is like. It’s been a casual, experience-based overview rather than a sales pitch, because frankly, a product like this sells itself to the right audience. As always, don’t trust, verify – and in that spirit, the Coldcard makes verification a way of life. Happy (and safe) stacking!
Frequently Asked Questions on Coldcard
Is Coldcard open source?
Yes – the Coldcard’s firmware (software that runs on the device) is open source and publicly available for review. This means the community can audit the code for vulnerabilities, adding transparency. (The Coldcard hardware uses secure elements which have proprietary aspects, but all critical wallet operations use verifiable open-source code.)
What is a Coldcard?
A Coldcard is a type of Bitcoin hardware wallet – basically a specialized mini-computer for storing Bitcoin keys securely offline. It looks like a small calculator and is used to sign Bitcoin transactions without exposing your private keys to an internet-connected device. In short, a Coldcard keeps your Bitcoin “cold” (offline) and safe.
How to use Coldcard MK4?
To use the Coldcard MK4, you first set it up by choosing a PIN and writing down your recovery seed words. Then, you connect it to a Bitcoin wallet software (like Sparrow, Specter, or Electrum) – either via USB or by transferring files on a microSD card. You receive bitcoins to addresses from the software (which the Coldcard can verify on-screen) and when you want to send bitcoins, you approve and sign the transaction on the Coldcard device. The signed transaction is then passed back to your software to broadcast. It’s a process of preparing transactions on your computer and securely signing them on the Coldcard.
How does Coldcard work?
Coldcard works by keeping your private keys off your computer and performing sensitive actions on the device itself. When you set up the Coldcard, it generates and stores your Bitcoin secret (the seed) in its secure chips. To spend funds, a transaction file (PSBT) is sent to the Coldcard (via SD card, USB, or NFC). The Coldcard’s screen lets you review the details (amount, destination) and then sign the transaction with your keys internally. The private keys never leave the Coldcard. The signed transaction is output for your computer to broadcast to the Bitcoin network. This way, even if your PC is compromised, the thief can’t steal your keys – they’d need the Coldcard (and your PIN) to actually sign any transfers.
Read Also: Biggest Crypto Bull Run of 2025: Technical Signals Align for Bitcoin & Ethereum